The August Offensive was an ambitious plan to break the stalemate that had developed at Gallipoli following the landings in April 1915. Military historian Richard Stowers explains the strategy, and outlines the myriad of problems that plagued the Anzacs.
Dawn at the Apex. Image courtesy of the New Zealand National Army Museum, W. A. Hampton Collection.
The August Offensive, a grand plan devised by Sir Ian Hamilton, but no different to the one he used in April, was to begin after dark on the evening of 6 August 1915. Again Hamilton – the Dardanelles Commander-in-Chief – wanted the Anzacs to cut a swathe straight across the peninsula in the direction of Maidos village (Eceabat) alongside the Narrows. He still believed that once the Dardanelles’ western foreshore was controlled, the British and French navies would be able to continue their push towards Constantinople.
After gathering valuable intelligence during June and July, the Anzac commanders latched on to a plan that they knew would be difficult: to push a large body of troops into the northern valleys that led to Chunuk Bair and the Sari Bair Ridge. From the ridge they could turn to the south and come down behind the Turkish trenches surrounding the present Anzac sector.
It became clear to Hamilton and his command that the only possibility of the operation being a success was to simultaneously start a third landing on the peninsula that could quickly link up with Anzac. So Command looked to the north and settled on Suvla Bay, less than five miles from Anzac and only lightly defended. Here, a strong force of British troops would land unopposed on 7 August.
The route the New Zealanders would take during the offensive resembled a clockwise half circle. They would start from No. 2 Outpost through three roughly converging deres or gullies separated by adjacent ridges, slowly swinging to the right and east towards Rhododendron Spur and Chunuk Bair, then turn further right and south towards Battleship Hill and Baby 700. Once the heights had been taken, their second objective was to release the Turkish stranglehold along the northeast perimeter of Anzac. Then a major Allied thrust towards the Dardanelles would break out through the more accessible northeast perimeter.
That was the theory, but in practice the plan bogged down in the approach to the Sari Bair Ridge and eventually collapsed on the summit of Chunuk Bair.
.jpg)
Big Table Top, captured by men of the Maori Contingent in a night attack early on 7 August 1915. This image shows some of the difficult terrain the New Zealanders were expected to cross in the dark before capturing Chunuk Bair. Image courtesy of Auckland War Memorial Museum – Tamaki Paenga Hira. Williams Album (1915), PH-ALB-212-p6-2.
.jpg)
The foothills which New Zealand forces captured in a night attack on 6-7 August 1915. Chunuk Bair is visible on the skyline in the distance. Image courtesy of Auckland War Memorial Museum – Tamaki Paenga Hira. Williams Album (1915), PH-ALB-212-p12-1.
The first action of the August Offensive was the costly diversionary attack at Lone Pine by the Australians at 5.30pm on 6 August. Their casualties in the attack and over the first two days’ defence amounted to over 1,700. The irony of the attack was that one of its objectives – to draw Turkish troops to the location and away from Northern Anzac – was not achieved. In a cruel twist of fate, reserve Turkish troops sent to the area in response, happened to be placed near Chunuk Bair when the New Zealanders later took the summit.
As planned, the New Zealanders commenced their offensive by setting out after dark on 6 August, overrunning numerous strong points including Old No. 3 Outpost, Table Top and Bauchop’s Hill with relatively low casualties, and started to amass on the slopes of Rhododendron Spur early on the following morning. The previous night’s efforts would become the most successful operation for the New Zealanders on Gallipoli, and would eventually prove to be the most successful Allied offensive operation of the Gallipoli campaign.
Charles Bean, Australian War Correspondent, summed up the importance of the night’s successes: “This magnificent feat of arms, the brilliance of which was never surpassed, if indeed equalled, during the campaign.”
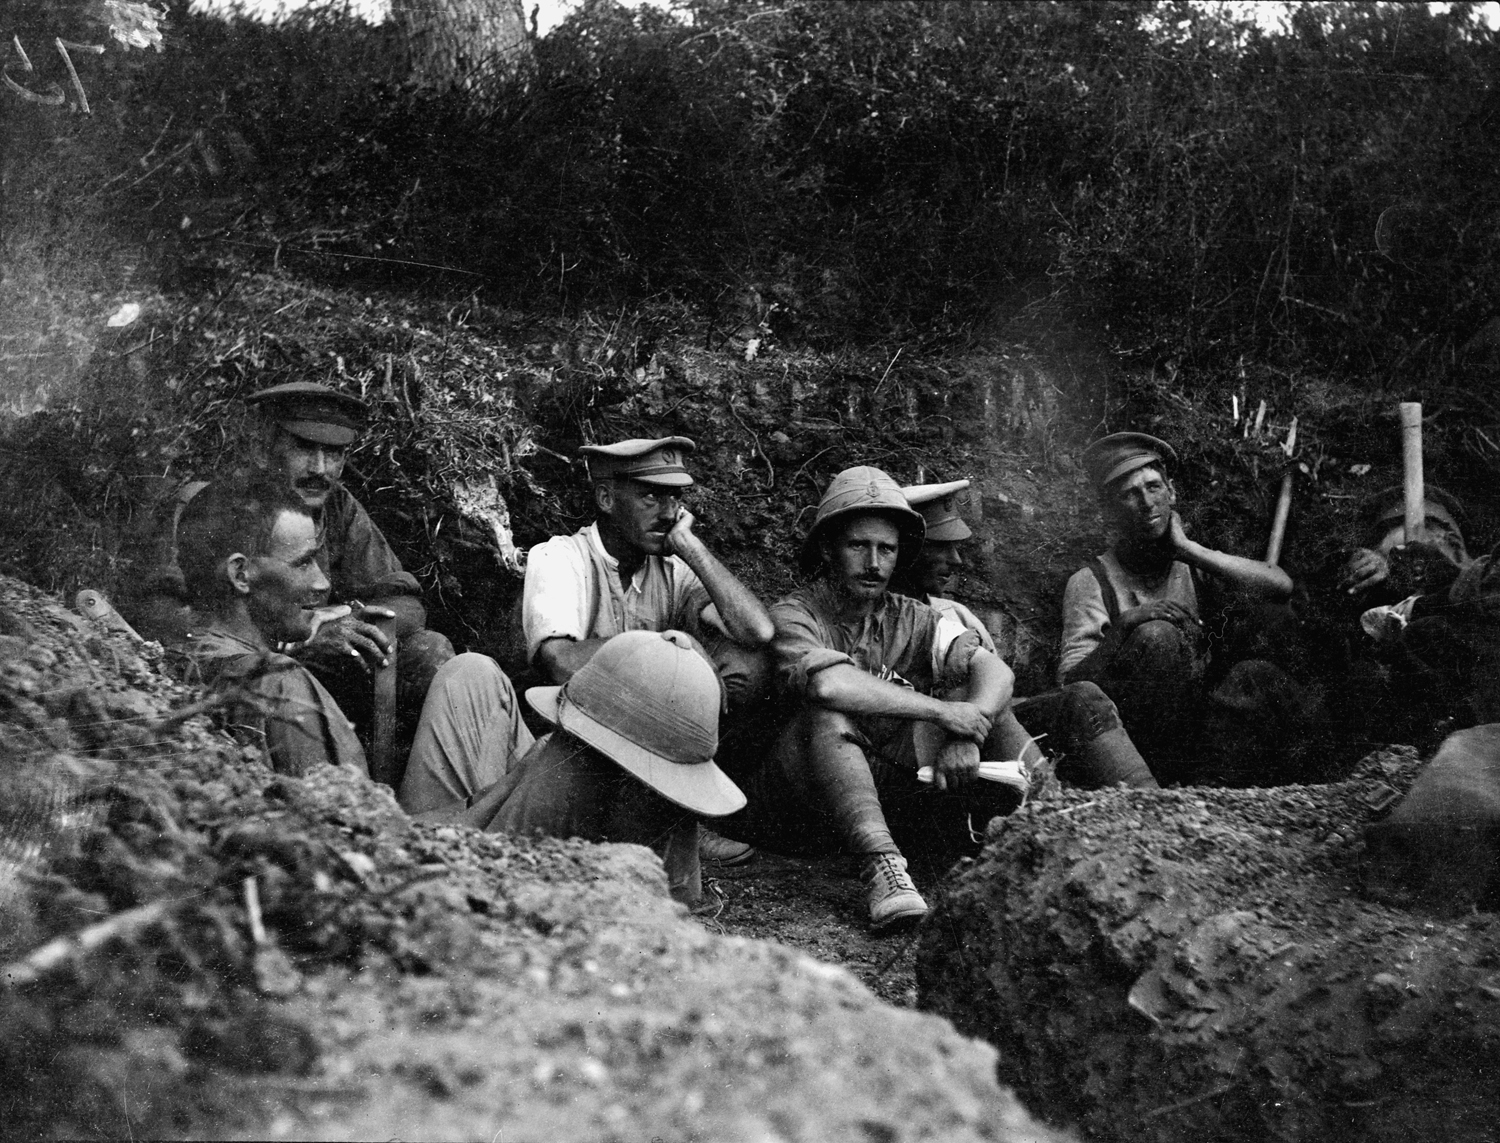
Exhausted soldiers, most likely of the Wellington Mounted Rifles, occupying a trench on Table Top during the night of 6 August 1915, in preparation for the attack on Chunuk Bair. Photograph taken by James Cornelius Read, and courtesy of the Alexander Turnbull Library, Ref: 1/4-058130-F.
But because of the rugged and mostly uncharted terrain encountered en route, the heavy equipment carried by the soldiers, and the tight, unworkable schedule, the original plan of capturing Chunuk Bair pre-dawn on 7 August became an impossibility.
The Anzacs experienced two tragedies on 7 August: Firstly, the Australian Light Horse attacked the Nek on the pretext of joining up with the New Zealanders who were meant to be moving towards the Nek from the direction of Chunuk Bair early in the morning. No one told the Australians that the New Zealanders’ thrust had stalled before Chunuk Bair at the Apex on Rhododendron Spur. At precisely 4.30am two waves, each of 150 Australians, climbed out of their trenches and dashed across the Nek, and within seconds of each charge not a man was left standing. A third wave, and half of a fourth met a similar fate.
Secondly, Colonel Francis Johnston, Commanding Officer of the New Zealand Infantry Brigade, ludicrously ordered the Auckland Infantry Battalion to attack Chunuk Bair, a distance of about 500 yards, at 11am. As they moved forward they were caught in a hail of bullets. They quickly learned there were Turkish machine-guns positioned on Chunuk Bair, but there could be no stopping until they got to the Pinnacle, a distance of well over 100 yards. Within seconds, the Aucklanders lost over 60 men killed.
.jpg)
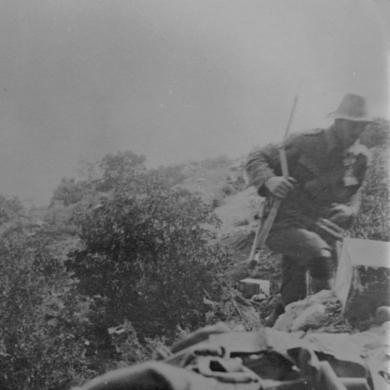
Machine Gun Officer of the Wellington Battalion, Lieutenant Allan Preston, ascends the hill from the Apex at dawn on 8 August 1915. Image courtesy of the New Zealand National Army Museum, W. A. Hampton Collection.
.jpg)
The rear companies of the Gloucesters advancing from the Apex under fire towards Chunuk Bair, 8 August 1915. Image courtesy of the New Zealand National Army Museum, W. A. Hampton Collection.
With the New Zealanders consolidating their position behind the Apex during the afternoon, the final assault of Chunuk Bair commenced pre-dawn on the following day, 8 August, lead by the Wellington Infantry Battalion under Lieutenant-Colonel William Malone. Surprisingly, they took the summit virtually unopposed and immediately commenced to dig in. It wasn’t long before the Turks started attacking, intensifying their charges as reinforcements arrived. Turkish artillery soon enfiladed the summit from at least two directions.
Four New Zealand units fought to hold Chunuk Bair. As well as the Wellington Infantry Battalion, there were the Auckland Mounted Rifles, Otago Infantry Battalion, and Wellington Mounted Rifles, in order of their arrival on the summit. Probably the fiercest and most desperate fighting of the whole Gallipoli campaign took place on the summit of Chunuk Bair over the two days the position was held by the New Zealanders.
Charles Bean wrote of the fighting: “… after the arrival of the Auckland Mounted Rifles there began a very violent bombardment of the slope by Turkish batteries firing from the south. … It appears to have been followed by a succession of attacks – hand grenades coming over fifty at a time, the enemy getting out of their trenches and advancing with officers at their head, the New Zealanders shooting them as they rose. This effort of the enemy, like its predecessors, was beaten back.”
As the Turkish bombs came over, the New Zealanders quickly grabbed them and hurled them back. Casualties came quickly from both Turkish bombs and lethal rifle fire that came from a range between three and 100 yards. When the Turks charged, the New Zealanders stood and fired as quickly as possible. Some Turks lay down as close as a few yards in front of the trenches with only their bayonets visible. The New Zealanders would take blind shots at them by pointing a loaded rifle at arm’s length over the parapet.
Trooper Murdoch Finlayson of the Auckland Mounted Rifles wrote: “What hell we went through … Men piled dead all around me, hands, legs, heads, bodies, equipment and rifles flying in the air, slung there by high explosive shells, how a man came out of it, God alone knows.”
.jpg)
The Advanced Dressing Station of No 1 Field Ambulance in the gully of Chailek Dere between Table Top and Rhododendron Ridge, Gallipoli, 1915. This position was established during the August Offensive (6 - 12 August). Wounded are lying on stretchers ready to be taken off Gallipoli to ships waiting out at sea. Image courtesy of the New Zealand National Army Museum, accession number: 1992.760
After two days and nights of bitter fighting, the New Zealanders finally vacated the summit on the night of 9 August, being relieved by two British infantry regiments who were quickly overrun by a massed Turkish attack early the following morning. The summit then remained under Turkish control for the remainder of the campaign while the New Zealanders formed a fortified line at the Apex.
Charles Bean was present when the remains of the Wellington Infantry reported to Headquarters after coming off Chunuk Bair: “Of the 760 of the Wellington Infantry Battalion who had captured the height that morning, there came out only 70 unwounded or slightly wounded men. Throughout that day not one had dreamed of leaving his post. Their uniforms were torn, their knees broken. They had no water since the morning; they could only talk in whispers; their eyes were sunken; their knees trembled; some broke down and cried like children.”
The Auckland Mounted Rifles suffered a similar fate. Of the nearly 288 Aucklanders that advanced on the summit, only 22 remained. Corporal James Watson of Cambridge was one of those 22. He later wrote: “Practically all the Auckland Mounted Rifles were killed or wounded. The fourth [Waikato Squadron] had about 16 left out of 89. All the officers were killed.”
Over the two days on Chunuk Bair, New Zealand suffered nearly 2,500 casualties, including over 800 dead. Over the five days of the August Offensive, 6-10 August, over 880 New Zealanders were killed and close to 2,500 wounded. By unit, the Auckland Infantry Battalion lost 100 dead, the Wellington Infantry Battalion 313, Canterbury Infantry Battalion 93, Otago Infantry Battalion 124, Auckland Mounted Rifles 90, Wellington Mounted Rifles 64, Canterbury Mounted Rifles 31, Otago Mounted Rifles 34, Maori Contingent 21, as well as 10 others. Only three Wellington Infantry deaths out of the 313 were recorded as dying of wounds, indicating that many wounded men died before receiving medical attention.
.jpg)
The kits of dead men after the August offensive, Gallipoli, 1915. In the background is Walker's Ridge leading up to Russell Top. Image courtesy of the New Zealand National Army Museum, accession number: 1991.588.
After the Battle of Chunuk Bair had concluded, one must have asked the obvious question: what exactly was Sir Ian Hamilton, and subsequently General Sir Alexander Godley, trying to achieve by taking Chunuk Bair? Hamilton seemed convinced that all his problems on Gallipoli would be solved by taking and controlling the heights and a section of the western shore of the Dardanelles, including the village of Maidos. This might have been possible on 25 April, but by August the element of surprise was well gone.
By taking the town of Maidos Hamilton might have controlled the Narrows and the 15-mile section of the Dardanelles between Maidos and the open sea, but he did not control the sea route to Constantinople. The Turks were still well aware of the threat of the British and French navies, and had shore batteries and sea minefields placed at strategic positions over the next 30 miles of the Dardanelles. In addition, by August the Turks had tens of thousands of troops in reserve to the north along the peninsula and on the Asian shore immediately across the Dardanelles. They also had mobile artillery batteries in reserve.
Hamilton even had a secondary plan: by taking Maidos he would effectively cut off a large portion of the Turkish army at Helles on the end of the peninsula, caught between Anzacs and the Allies at Helles. Was Hamilton hoping to force the Turkish Army to surrender? Was he aware of the tens of thousands of Turks in reserve to the north? If the Anzacs did manage to cut a corridor across the peninsula, the newly extended front and subsequently stretched resources would probably have produced far more casualties than those suffered by the Allies during the offensive.
Trooper Kenneth Stevens of the Auckland Mounted Rifles later wrote: “I think it was lucky for us that the Turks did not let us get a mile or so further inland, because we could have never maintained an army in that rough country. It was bad enough as it was.”
.jpg)
ANZAC soldiers sitting beside graves at No. 2 Outpost after the August Offensive, 1915. Image courtesy of Auckland War Memorial Museum – Tamaki Paenga Hira. PH-RES-1471.
The only possible alternative use for the captured Chunuk Bair would be to place artillery on its heights and pound Turkish troops and supply lines. But the Allies would need at least ten large guns to be effective and a constant supply of ammunition to fire them, and the logistics of transporting guns and ammunition to the summit would never have made that possible. As well, the Turks would have been unrelenting in pounding Chunuk Bair both day and night with accurate and heavy artillery fire.
A compromise would have been to place a forward observation post on the summit, and relay target locations to the big guns of the Royal Navy and howitzers at Anzac. But the position would have become an easy target for Turkish artillery, plus the Royal Navy and Anzac artillery wouldn’t be able to sustain the supply of ammunition needed to pound the Turks into submission. As it was, they were struggling to sustain an artillery barrage for just 30 minutes. So Hamilton’s glorious plan to capture the Sari Bair Ridge and force a corridor through to the Dardanelles was doomed before it started.
Perhaps Gallipoli was a part of a bigger picture. Was London afraid that if the British forces could not mop up the Dardanelles campaign, Great Britain would appear vulnerable causing eastern countries to take sides with Turkey? If so, perhaps the New Zealanders, Australians and other Allied soldiers on Gallipoli became a politically expendable force whose fate was determined by politicians in London.
Chunuk Bair was only one of many hills on the Sari Bair Ridge that commanded views over the Dardanelles. If the Anzacs were to conquer the Turks they would have to control them all. Although Chunuk Bair was reasonably close to the Anzac sector, supplies and reinforcements could not be maintained on the summit over the two days it was held by the New Zealanders. The problem was the terrain. General Godley and Sir Ian Hamilton chose to launch an offensive across difficult terrain, further compounding the very problem they were trying to alleviate.
The factor contributing most to the failure of on Chunuk Bair and the August Offensive was the breakdown of the new front at Suvla Bay. It was intended that the newly-landed British force would rapidly push forward and combine with the Anzacs to capture the Sari Bair Ridge. The other intention of the Sulva landing was to split the enemy forces and thereby weaken the strong Turkish force against Anzac. But this never happened.
The only benefit to be gained from the August Offensive was the extra space overrun to the north, giving more sanctuary to the men at Anzac. Extra space was freed up alongside North Beach allowing for the construction of depots, hospitals, and two substantial piers.